 |
| My completed Piece. The embroidery part was my favourite because the machine I used was really steady and simple giving me a great finish. I think the overall piece looks simple but elegant because the detail speaks for itself. By using puff binder and stitch I have complemented a simple screen print and I have finally achieved a beautiful piece of fabric to complete the project set 'Fun of the Fair'. |
Thursday, 31 October 2013
My Final Piece Complete!
Final Piece Stage 4... Sewing
 |
| The Sewing Machine I used was the 'BERNINA record'. I decided to use this machine because it was recommended for embroidery. |
 |
| I then set up the machine and placed Red thread in the spool and Turquoise metallic thread at the top. I started sewing in between the wheels and over some of the black sections to highlight the detail. I used setting number 5 which was a zigzag stitch. |
 |
| A close up of the stitch I did. |
Final Piece Stage 3... Puff Binder
 |
| (After) to create the 'Puff' effect I heated the Puff Binder up with the heat gun, it then reveals a gorgeous pattern, it is now a repeat print using two different methods. It is quite tricky trying to line up your image to do a repeat print but I managed successfully. |
 |
| (Before) When my screen and print was dry I fixed the pigment ink using the heat press at 180 degrees for 20 seconds. Using the same method before I screen printed plain Puff Binder either side of my black print, joining the repeat pattern together (Revealing a continuous pattern). I then thoroughly washed the excess puff binder away to prevent the screen from blocking. I placed the screen in the drying cupboard. My printing is now complete. |
Final Piece Stage 2... Screen Print
 |
| I then wanted to do a single Screen print in the middle of the dyed fabric. To do this I dabbed some Black SN-G pigment ink across the top of the image, then with a squeegee I pulled down the ink firmly a couple of times revealing a print. The next step after this was to thoroughly wash the screen and squeegee using the power hose so that the ink doesn't get stuck, once rinsed I placed the screen in the drying cupboard for 15 minutes ready to be used again. |
 |
| Black SN-G Pigment ink |
 |
| Squeegee |
 |
| Single Screen Print |
My Final Piece Stage 1
 |
I started off by dying an A3 piece of cotton, to do this I simply taped each corner to the table to secure it down in place, I then dyed the fabric with Prussian Blue Brusho ink (with a paint Brush). I then let it naturally dry. To fix the colour and make it crease free I put it on the heat press for 18 seconds at 180 degrees. |
Tuesday, 22 October 2013
Layer and Burn/ Stitch and Burn
Method
Get two sheets of different coloured organza and place a sheet of Bondaweb in between. Then iron over the organza to bond the organza together by melting the Bondaweb. Try to avoid it sticking to the iron. Then place the organza in an embroidery hoop , you can either hand stitch or machine stitch into it. Stitch with metallic thread to give a beautiful appearance. The more pattern and compact your design is the better the result. Once you have finished stitching, wave a heat gun over the material for a couple of seconds and watch it shrivel up. Finally you will end up with a stunning design.
 |
| Layer and burn, orange and pink organza, Bondaweb, various colours of metallic thread, embroidery hoop used, stitch: straight,zigzag. Once I burnt it, it left a couple of holes by accident so I stitched it to some thicker fabric to neaten it up. I now like my completed design. |
Thursday, 17 October 2013
Other Prints
 |
| Scrap material (American flag), Screen print, Black SN-G, repeat print. This print was simple but still interesting. |
 |
| Scrap green material, Screen print, repeat print, Black SN-G, plain Puff Binder. The original material had two levels to it in the embroidery which made the overall print look effective. |
 |
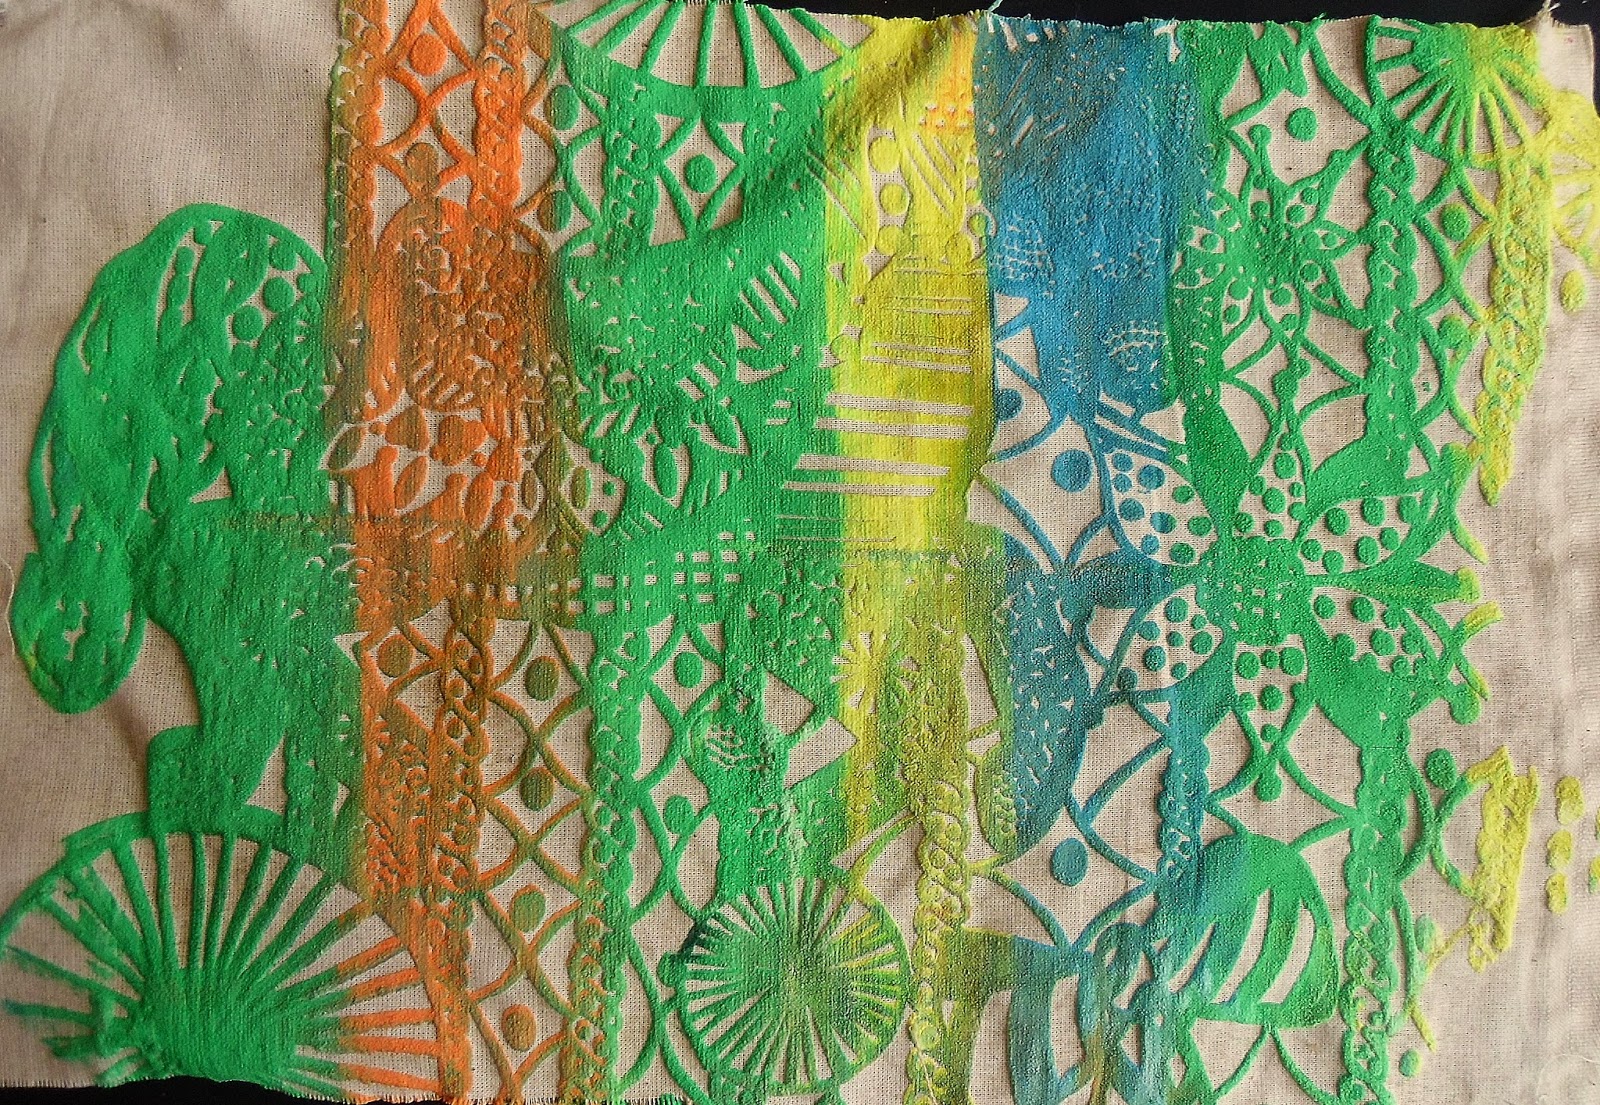
| Heavy Viscose Satin, screen print, plain Puff Binder,Procion dyes: Orange Mx2R, Yellow Mx4G, Red Mx5B, Blue MxR, Turquoise MxG. All the colours I used matched perfectly to my project and the result of this print was Beautiful. |
 |
| Cut up old denim jeans, screen print, plain Puff Binder and Puff Binder mixed with Miner print Brill Red BB, Black fine liner pen. The Puff Binder made part of the detail disappear so I decided to work into it with pen. |
 |
| Brown paper, carved polystyrene print using blunt pencil, Black Gouache paint. (inspired by project). |
Tuesday, 15 October 2013
More pages in my sketch book
Artist Research and collages.

Historic repeat pattern artist 'William Morris'. Who draws from floral nature studies.

Screen Print sample collage including Puff Binder.

Screen Print photocopies collage.

Modern repeat pattern artist 'Emily Feaver'. Who draws from her surroundings such as fisherman, sea and nature.


 |
| Modern repeat pattern artist 'Emily Feaver'. Who draws from her surroundings such as fisherman, sea and nature. |
Puff Binder on Card
 |
| Card, Pink and Purple mixed Brusho ink, Puff Binder, left over Puff Binder+ a mixture of colours creating a dull green, Screen Print, black fine liner pen. I didn't like this print at first because it wasn't clear what the image was so I decided to work into it using black fine liner pen to give it a Gothic effect. |
 |
| Brown Card, green and gold painted background, Screen Print, Black SN-G, Puff Binder: left over Puff Binder+a mixture of colours creating a dull green, Repeat print. I like this print because I experimented by recycling unwanted puff Binder colours in a mixing pot and it created an interesting print. |
 |
| Black Card, Screen Print, Plain Puff Binder (Repeat Print). |
 |
| Black Card, Screen Print, plain Puff Binder. I love this print because it was so simple but gave a striking effect and looks like lace with the white against the black. |
 |
| Card, Screen Print: Black SN-G on top of Puff Binder: Q Print Turquoise 4g, Minerprint Brill Red BB, Minerprint Brill Pink 5BTL. I created stripes of Puff binder, and then did a screen print on top so that it was only a faint image. This is an experimental piece that turned out better than I thought. |
 |
| Card, Screen Print, Pigment colours: Orange OL, Puff Binder colours: Q Print Turquoise 4g, Minerprint Brill Red BB, Minerprint Brill Pink 5BTL, Q Print Yellow 2g (rainbow print). I pulled the squeegee towards me and the colours accidentally mixed in the middle of the print, however this creates an even more beautiful rainbow design. This is one of my favourite designs because its bright and very appropriate for the project i'm doing. |
 |
| Brown card, Screen Print, (Multicoloured), Puff Binder: Plain, Q Print Turquoise 4g, Minerprint Brill Red BB, Minerprint Brill Pink 5BTL, Q Print Yellow 2g, Minerprint Green, Minerprint Orange g. I like this print because the image isn't quite clear so you can make of it what you want, showing a beautiful rainbow of colours. |
My Screen Prints on Calico
 |
| Calico, screen print, repeat print, rotated print, Procion dye: Red Mx5B, Pigment: Black SN-G, Plain Puff Binder, Embroidery silk thread, cotton thread, pen. I tried machine sewing on top of the puff binder but the needle kept getting stuck so I decided to hand stitch it using various colours of silk thread, I didn't like the finish of it because the thread was too thick and looked slightly messy. |
 |
| Calico, Screen Print, Turquoise Brusho ink, Puff Binder: plain, repeat print. I love this print because they are soft baby colours that would make great fabric for children. |
 |
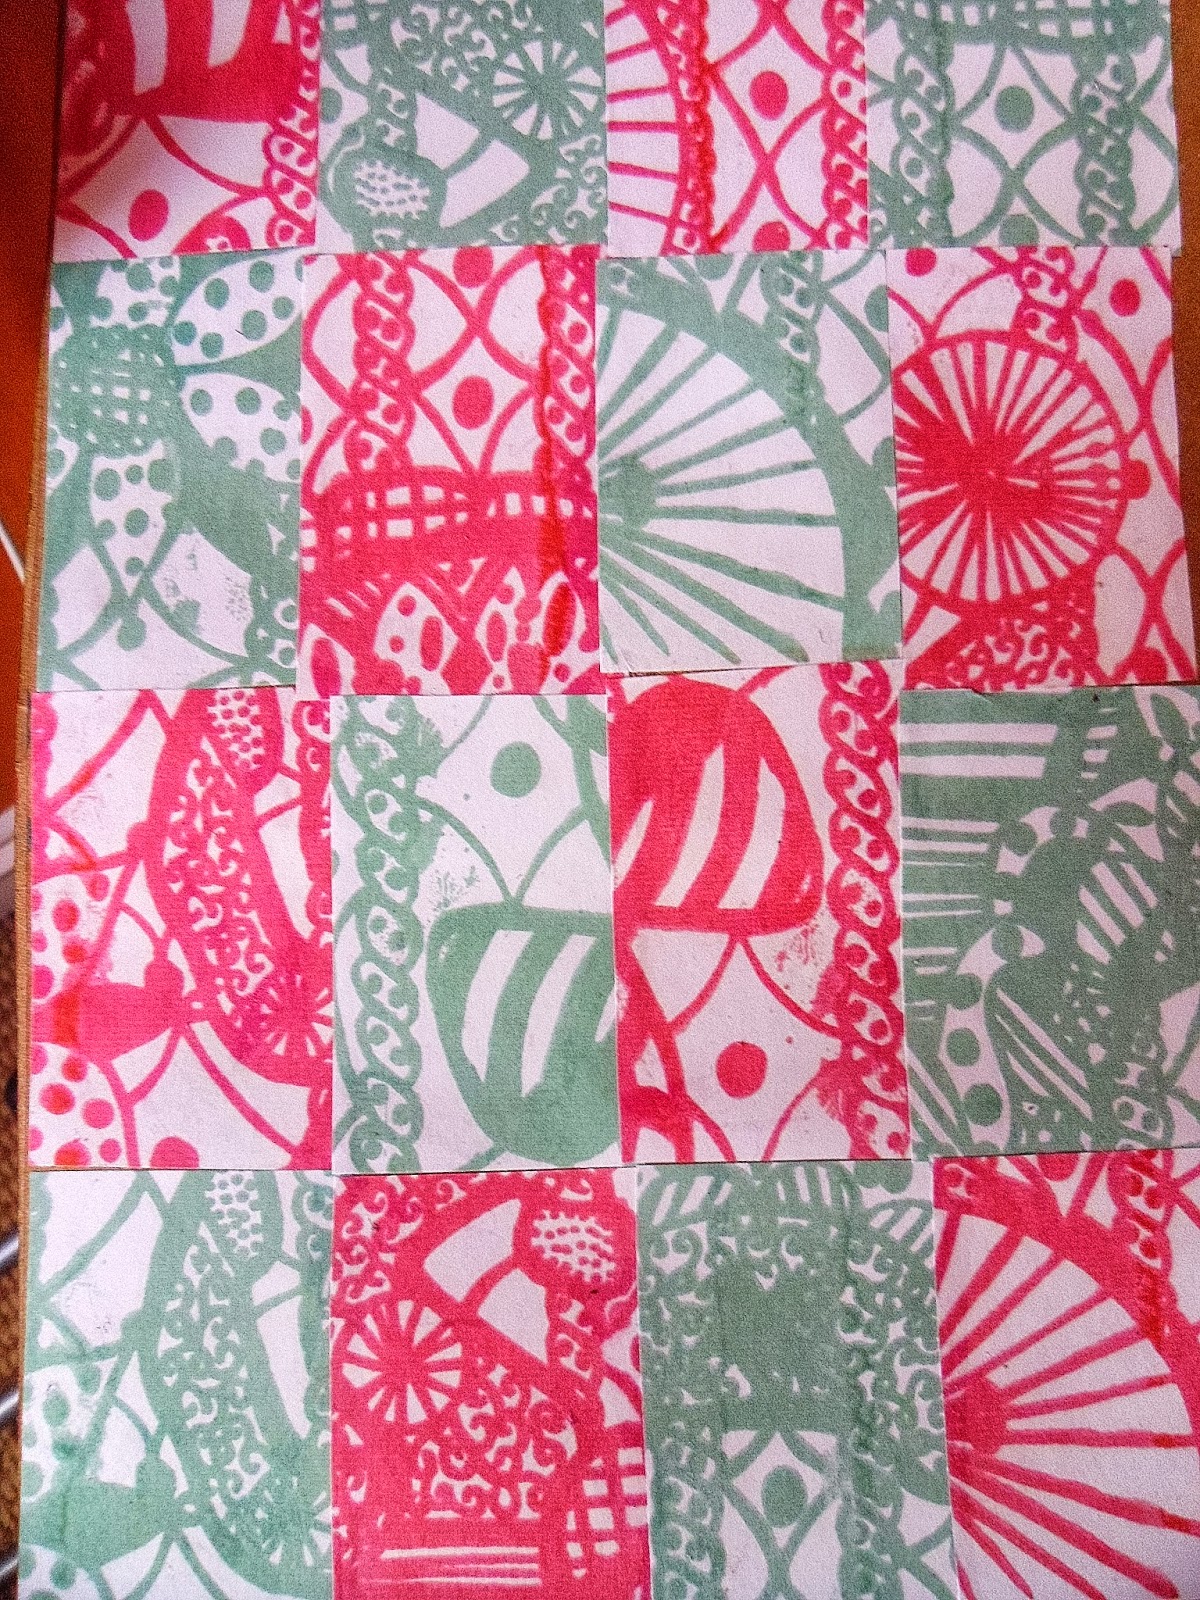
| Calico, Multicoloured Screen Print, Pigment ink: Pink 5BTL, Violet Blue 2BTL, Turquoise 4G, Yellow 10GL, Red BTL, Repeat print. This is one of my favourite prints because I put random blobs of colour all around the screen, then I swirled them together with the squeegee to create a rainbow print. |
 |
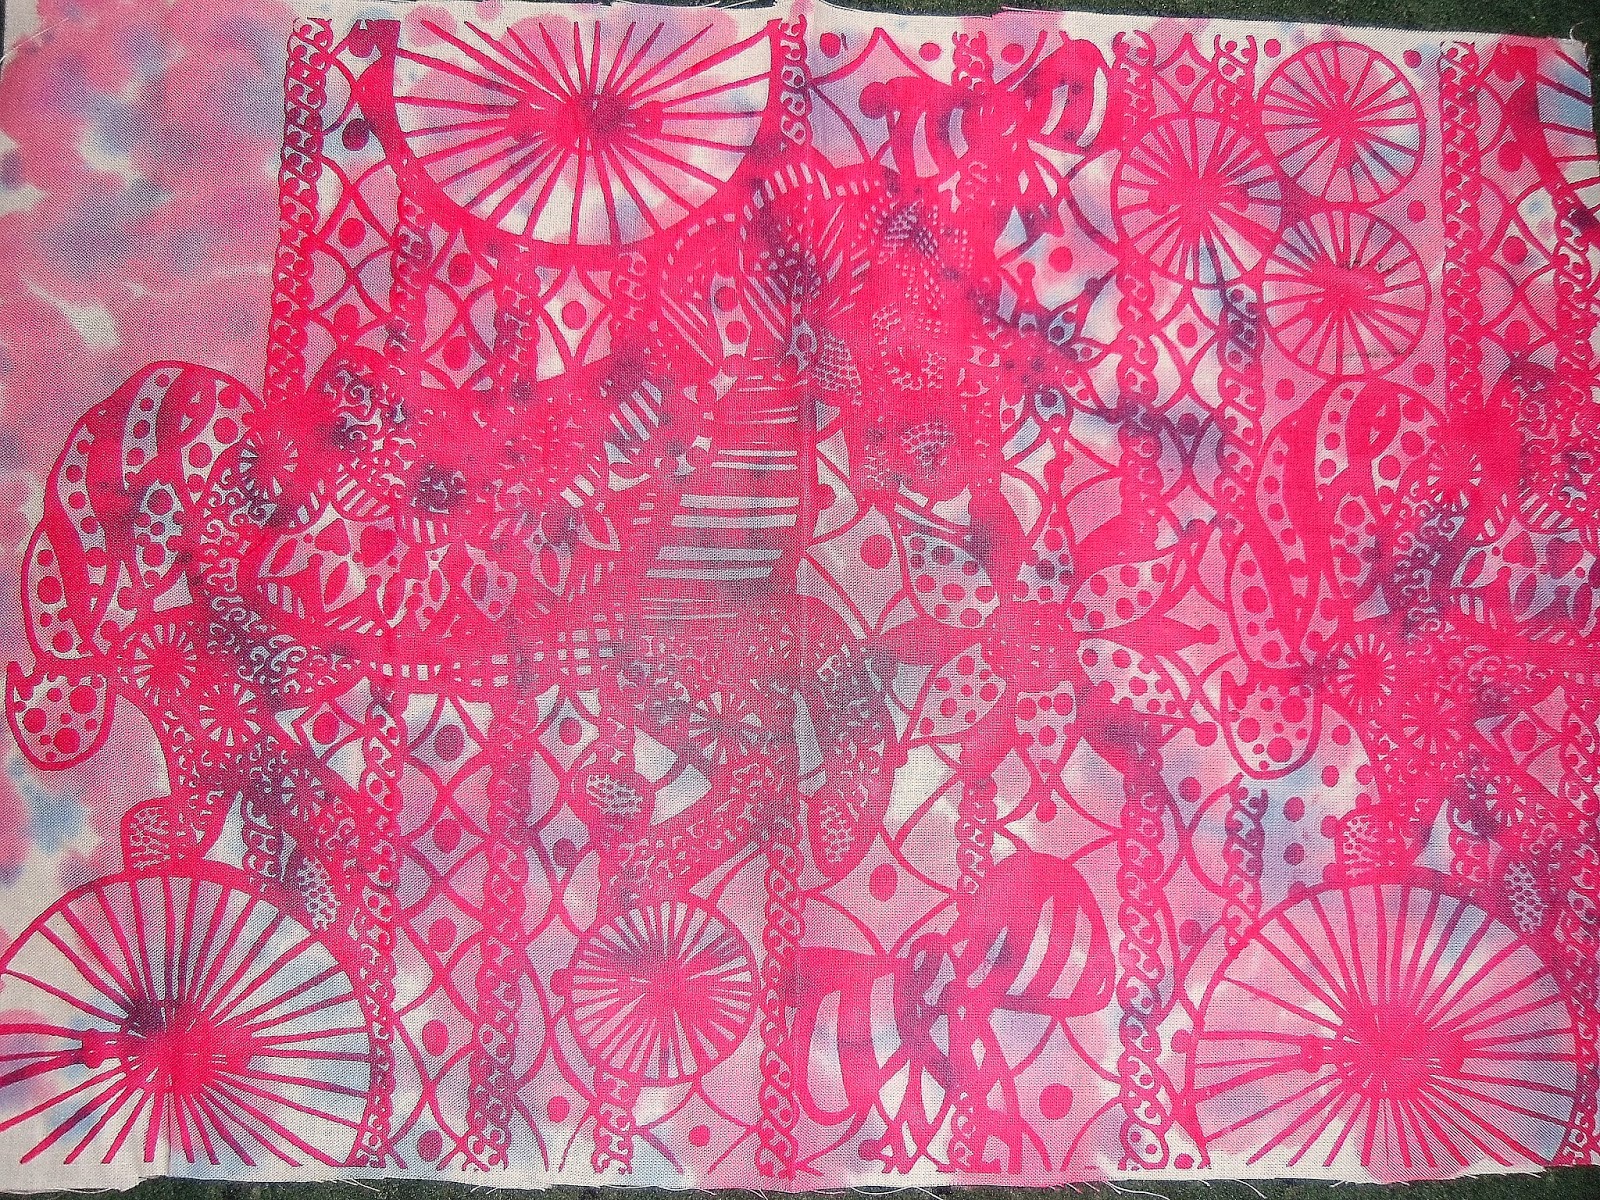
| Calico, Procion dye: Yellow Mx3R, Red Mx2R, Turquoise MxG. (scrunched up material to create camouflage dye effect). Screen Print: Black SN-G, Screen Print plain puff binder. This is one of my favourite designs because you can see the black screen print peaking through the beautiful puff binder print, this creates an elegant approach to fabric. |
 |
| Calico, Procion dye: Black K2647, Screen Print, (Rainbow) Puff Binder: Q Print Turquoise 4g, Minerprint Brill Red BB, Minerprint Brill Pink 5BTL, Q Print Yellow 2g. I don't really like this print because when I dyed the fabric it turned grey and the colours from the puff binder look quite dull. |
Friday, 11 October 2013
Batik
 |
| Batik, Card, Brusho ink: Emerald Green, Purple. |
 |
| (After) Batik, Card, Brusho ink: Yellow,Pink,Purple. |
 |
| Batik, card, dyed with orange and turquoise Brusho ink. |
 |
| Wax drawing (before) |
 |
| Batik, Card, layered wax using 2 colours on top of each other (First dye the card and then do a pattern, put second colour on and then melt all of the wax away). Brusho ink: Emerald Green, Cobalt Blue. |
Printing with Puff Binder
Puff binder also known as Minerfoam B is a paste that gives a 3D effect to fabric. It can be screen printed on or hand painted on. Once it has been applied to fabric it needs to be heated up to create the "puff" effect. If you use plain puff binder it will turn white when heated up. Pigment inks can be added to puff binder to make a coloured print, but when heated up it will be pastel colour rather than bold colours, Because the paste is already white. Mix any colours you need and screen print the puff binder paste onto your fabric using a squeegee, 2 pulls is enough. The screen can only be used twice because the screen becomes easily blocked when puff binder is in use. Wash your screen first and put in the drying cupboard. Heat now needs to be applied. Using a heat gun, lightly wave the heat over the fabric, until the print "puffs" up. Be aware of hot surfaces when using the heat gun. I really like using puff binder because even if your print isn't perfect puff binder always seems to improve any flaw in your work. It is my favorite technique in the printing room.
 |
| Borsalini, screen print, puff binder, mix of left over colours such as Miner print Green,Orange g, Red, Q print Turquoise,Yellow. (experimental piece) |
 |
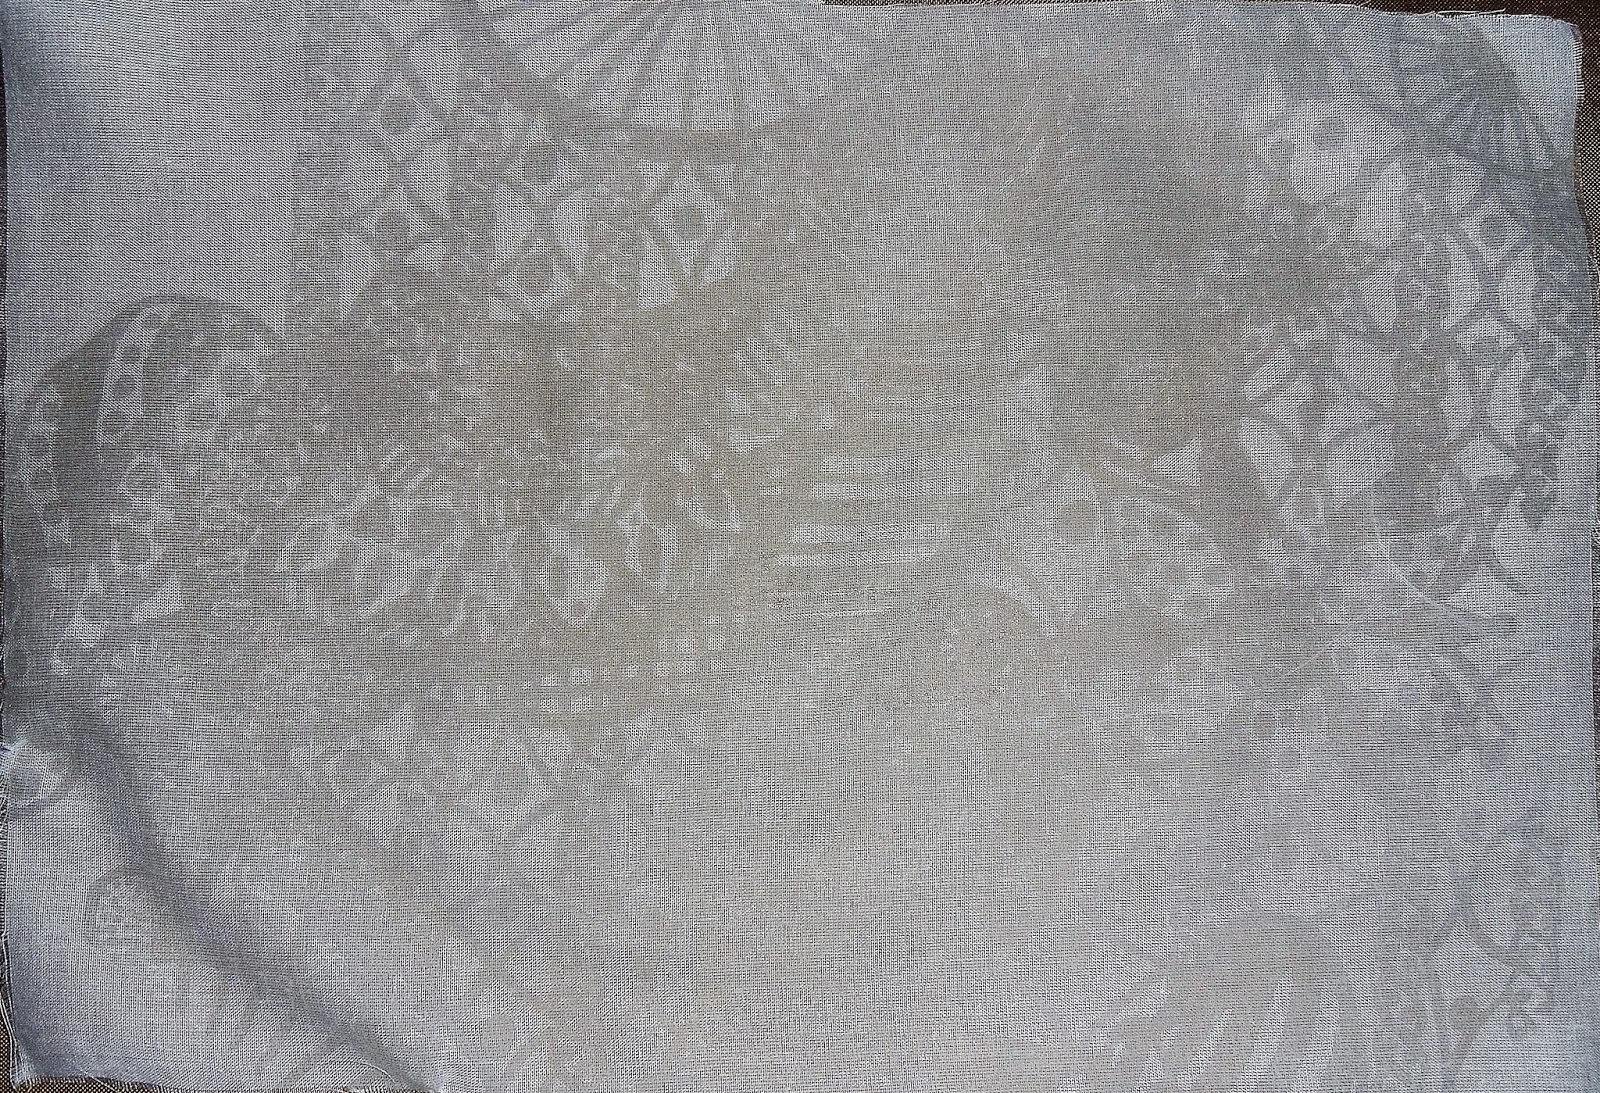
| (Before heat appliance) Calico, screen print, puff binder, colours added: Miner print Green, Orange g, Q print Yellow, Turquoise. |
 |
| (After heat appliance) I prefer the design after heat appliance because the colours are not as harsh because they turn pastel when heated up. |
 |
| Stages of the "puff" process. Heat being applied. |
My Devore Prints
 |
| Devore Velvet, Screen Print, Devore Paste. Print Devore paste on the back off Devore Velvet. This Print was the most successful out of all the Devore Prints because it shows all the intricate detail intended. |
Process: Dab Devore paste at the top of your screen. Firmly drag down the Devore paste with a squeegee 2 to 4 times depending on how delicate the fabric is. Once the paste has printed hang your fabric to naturally dry. Once dry you need to fix the paste using direct heat. Put your fabric on the heat press for 20 seconds. Your fabric will now have a yellow colour to it where it has burnt away. The next step is to rinse under a cold tap and rub away the fibers revealing a lace pattern effect where the fibers have gone. Dry under a dryer or leave to naturally dry. You can now use Procion dyes to dye your Devore print if you so wish. Wear protective gloves and apron. I found doing this process quite challenging because my screen pattern is so detailed that the Devore paste went though to thickly, and when the process had been completed some of my image looked like blobs of burnt away fibers.
 |
| (Before) Devore Silk, screen print. |
 |
| Devore paste. |
 |
| Devore velvet, screen print Devore paste, Procion dyes: Turquoise MxG, Red Mx5B. When I dyed the material it turned purple because the Turquoise mixed with the red so it resulted in different tones of colours. This is my favourite Devore print because the fabric is so effective and delicate. |
 |
| Azeta, screen print, Procion dyes: Red Mx5b |
 |
| (After) Devore silk, screen print, Procion dyes: Red Mx2R, Yellow Mx3R. |
Thursday, 10 October 2013
My Screen Prints on Cotton
 |
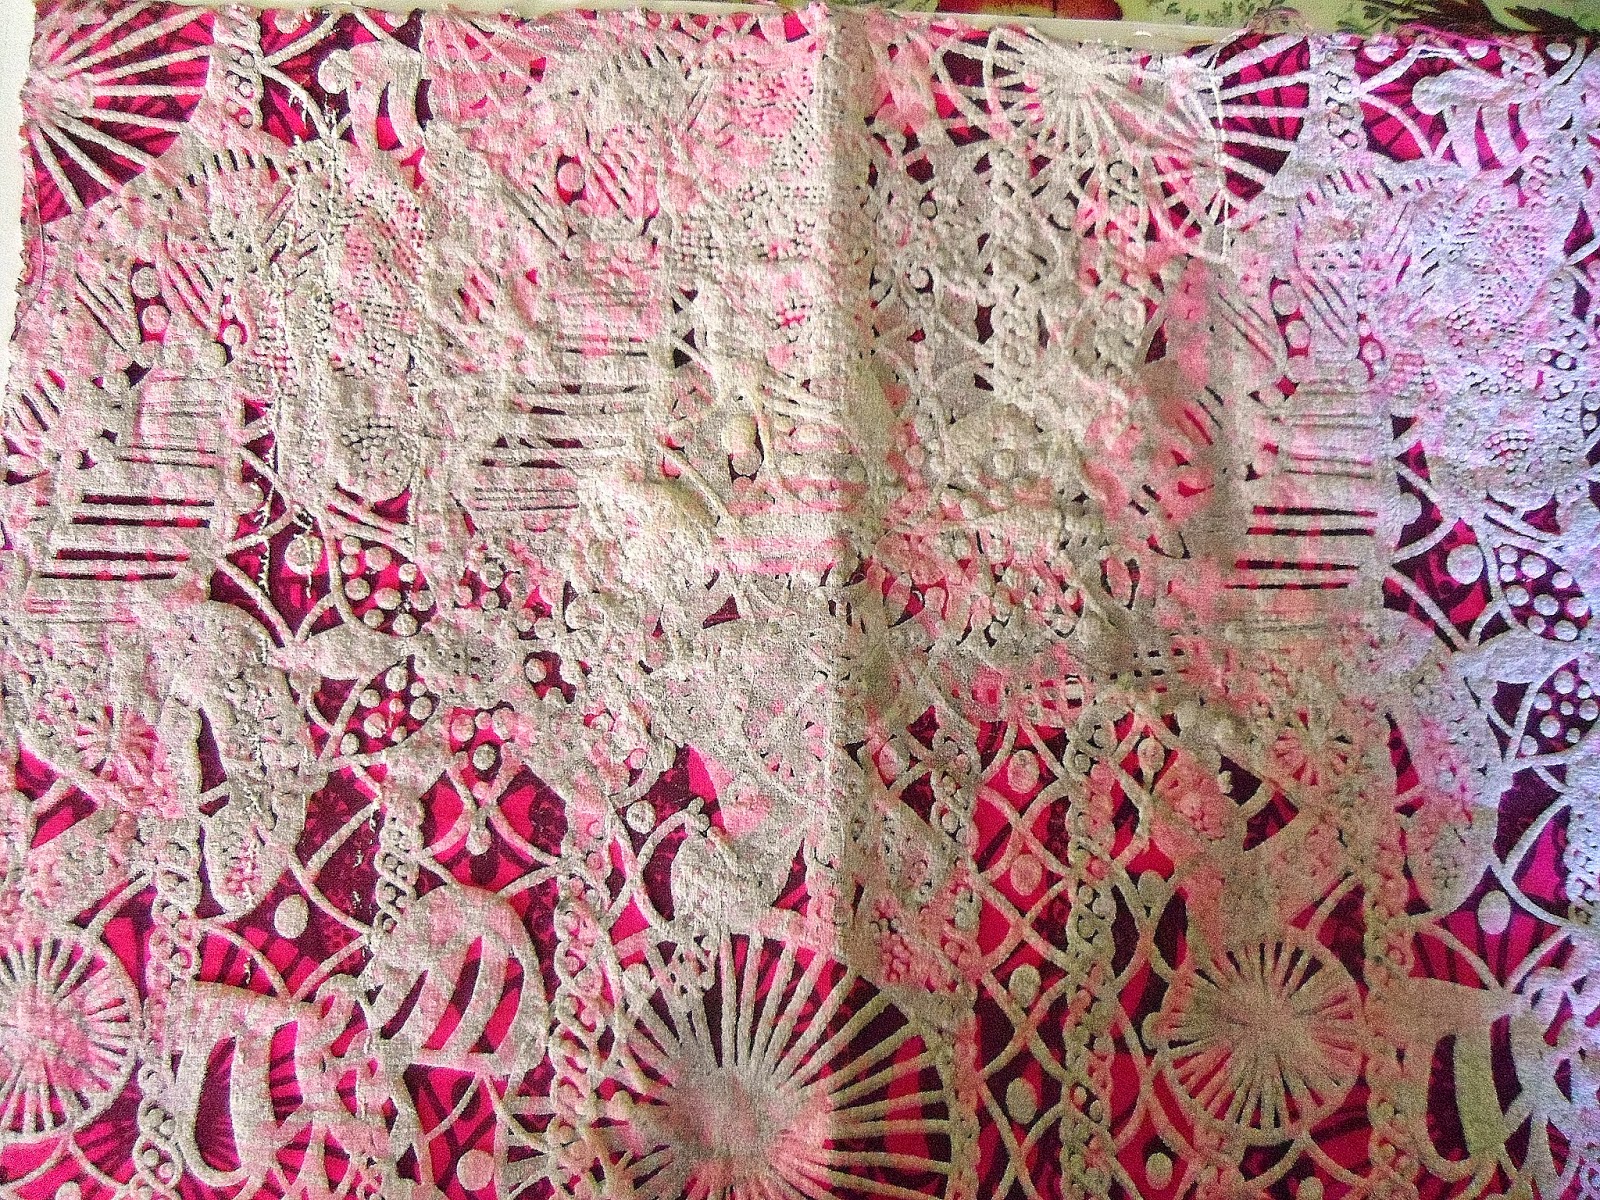
| (After heat appliance) "Puff" up. I prefer the design before I heated it up because they were strong vibrant colours and you could see all the intricate detail. |
 |
| Cotton, Repeat Print, drops of red and blue Brusho ink to dye fabric, Pigment colour used: Red BTL. |
 |
| With Screen Printed Puff Binder on top. |
 |
| With Screen Printed Puff Binder on top. |
 |
| Cotton, Procion dyes, Turquoise MxG, Red Mx5B, Screen Print, Pigment colours: Orange OL, Black SN-G, Puff Binder: Turquoise 4g (hand painted on). |
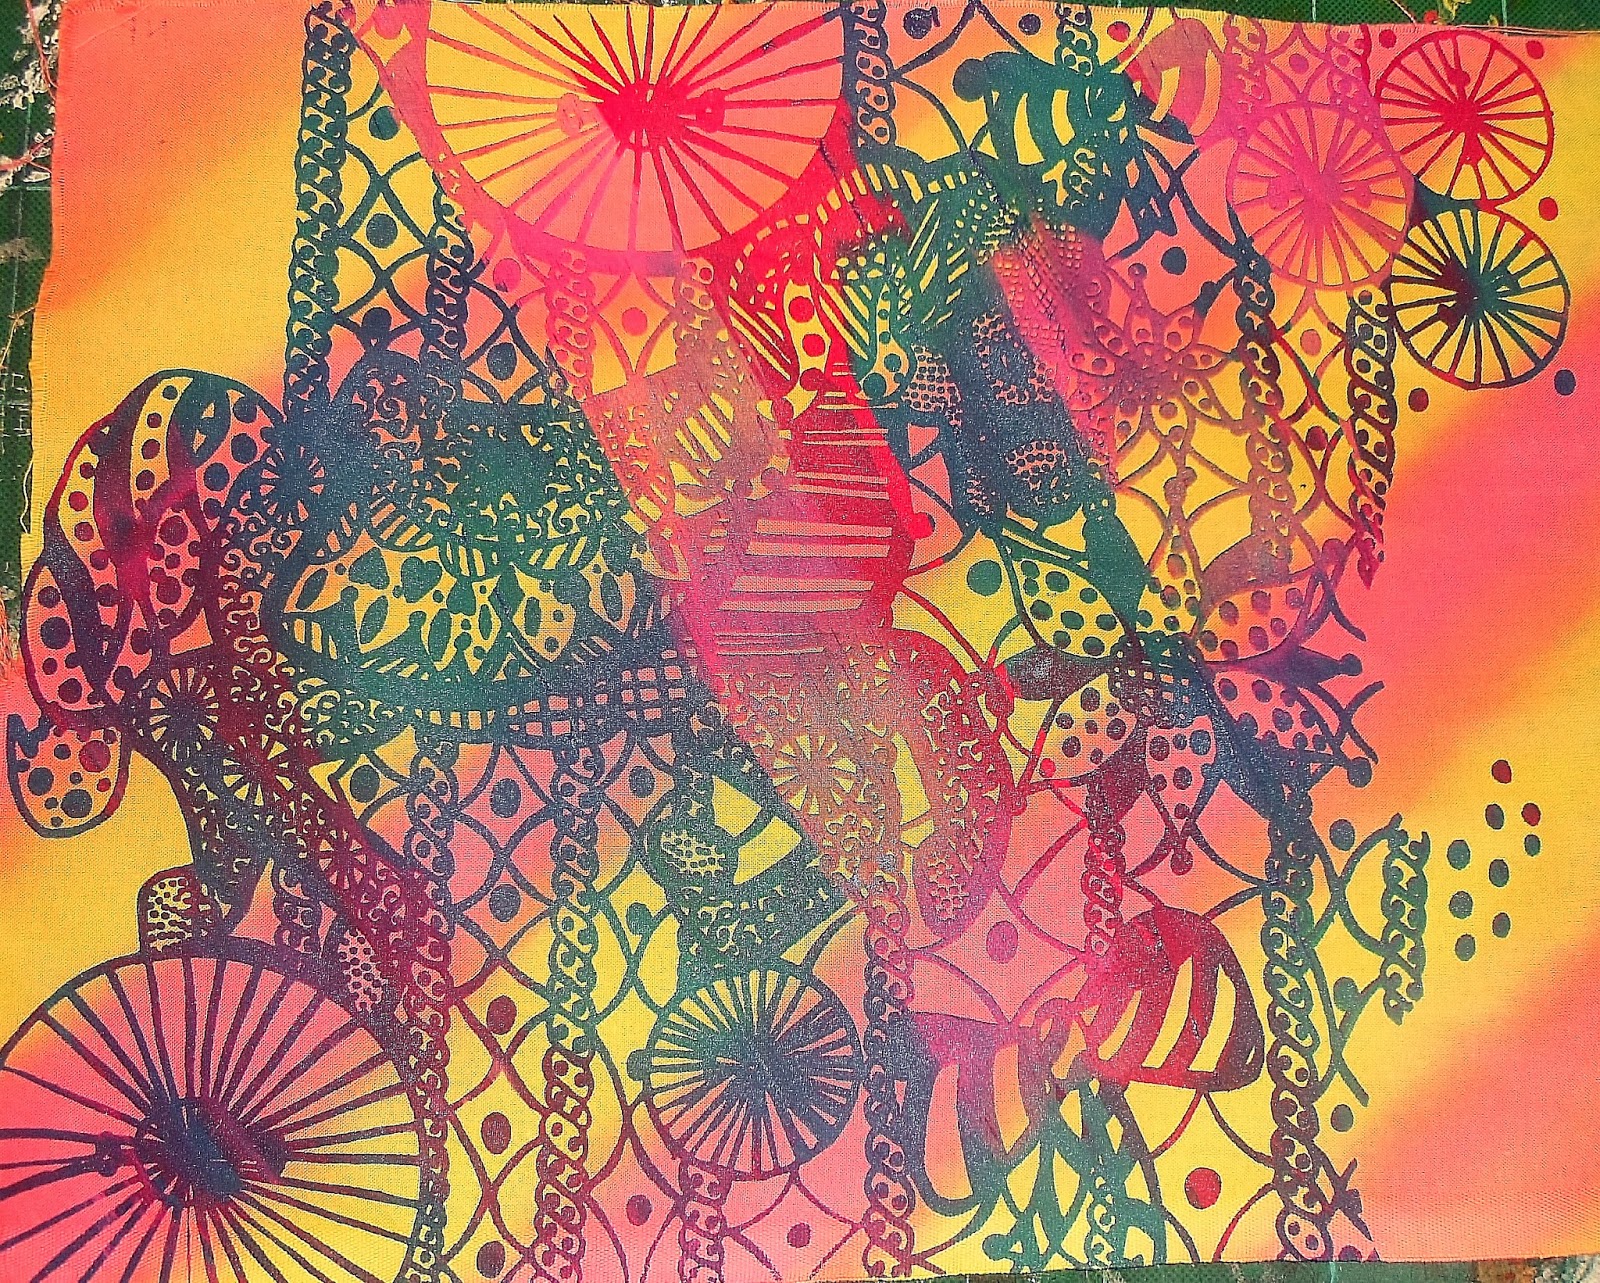 |
| (Before heat appliance), Cotton, Procion dyes: Yellow Mx4G, Red Mx2R (Stripes). (Rainbow) Puff Binder: Q Print Turquoise 4g, Minerprint Brill Red BB, Minerprint Brill Pink 5BTL, Screen Print. |
 |
| Cotton, Screen Print, Red Mx5B, Black SN-G, plain Puff Binder,Repeat Print. I like this piece, however I layered the puff binder by accident resulting in too much white. |
 |
| Cotton, purple Brusho ink, Screen Print, repeat print, Pigment ink: Black SN-G, Pink 5BTL, Turquoise 4G, Violet Blue 2BTL, Red BTL. I put blobs of different colour pigment all over the image and pulled the ink through, revealing a faint coloured background on top of the fabric, I then screen printed black on top of that to create a contrasting image. |
 |
| Cotton, single print, blue Brusho ink to dye fabric, pigment colour used: Black SN-G. |
Subscribe to:
Posts (Atom)